
How to Apply TT& PP
Applying wall decals is comparatively easy, but nevertheless, we recommend you to follow our instructions to make sure you will apply your wall sticker the right way from the first time.Further in text we refer to walls, but the same is valid for any smooth surface where you can apply decals - tiles, glass, furniture. You can find more details in section Surfaces.
• Taking your time when applying the decals will help you achieve the best results. Make sure everything is in position before removing the backing layer as the adhesive layer below is very sticky.
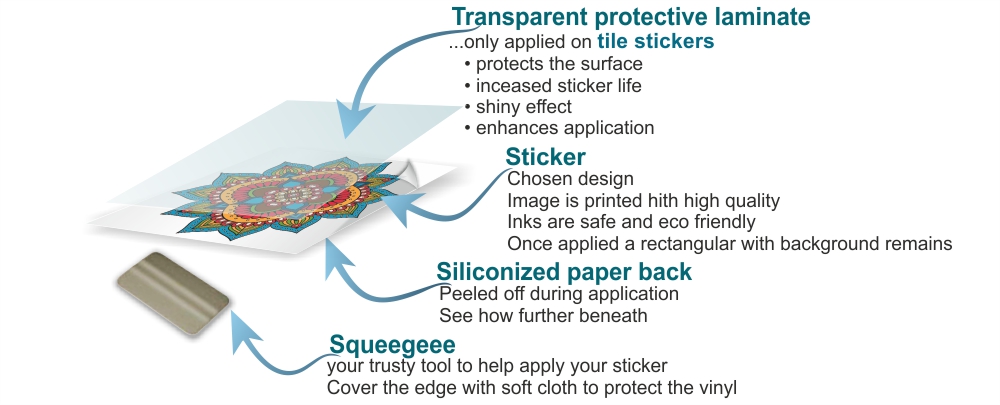 |
HOW TO APPLY STICKERS ON TILES
Same instructions are valid when applying FLOOR GRAPHICS and for all SMALL DECALS WITHOUT TRANSFER TAPE.
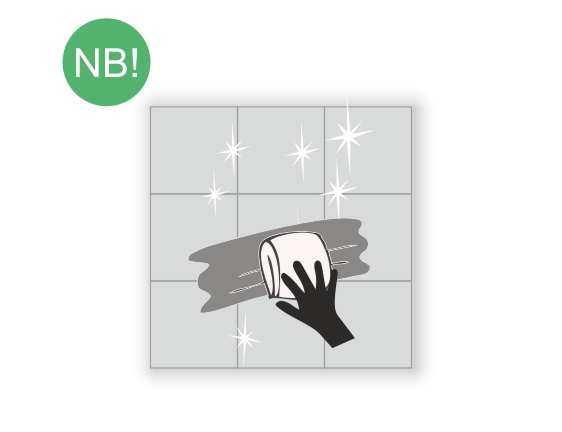 |  |
Important! Clean the surface with a wet cloth to ensure that there are no dust or small particles. Let it dry. | 1. Preparation |
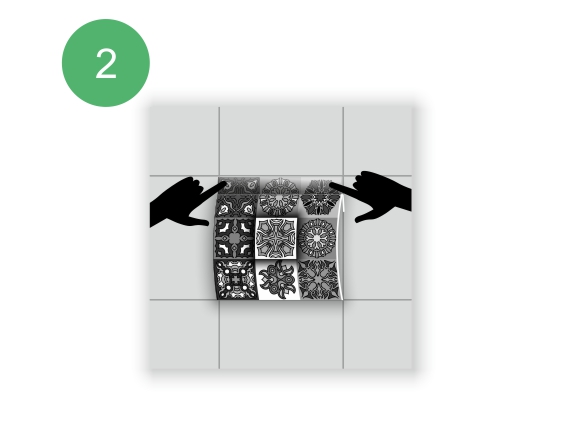 | 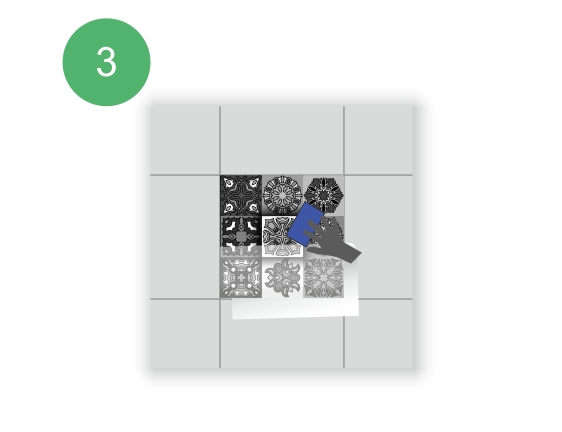 |
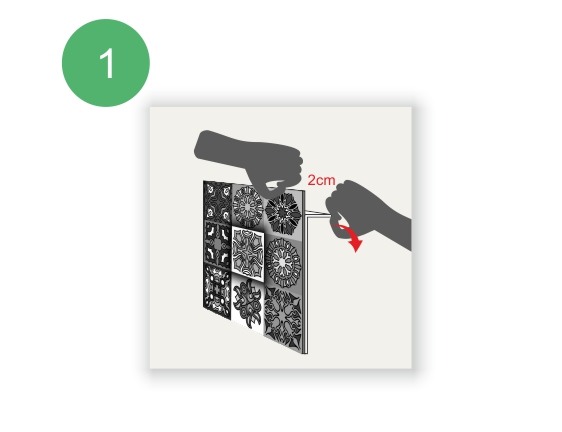
2. Adjustment | 3. Application • With the help of squeegee gradually apply the sticker to the tile. • If any bubbles appear or if you want to slightly change position, you can peel of and press again (do this only if inevitable) • Avoid uneven surfaces, like the round edges of tiles. |
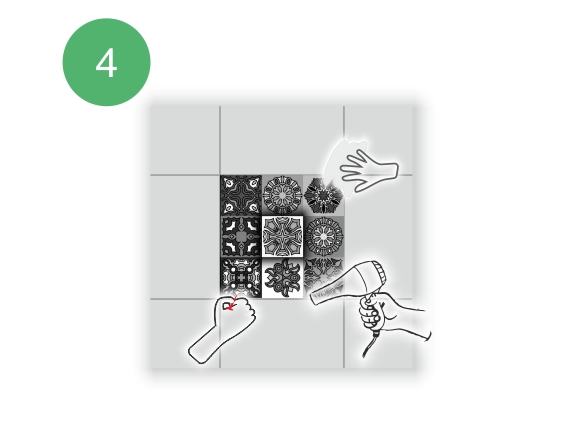 |  |
| 4. Did you peel off the whole back? • you can wipe off fingerprints. • if there are any bubbles, punch them with a pin and press. | Now you have it! You can boast now and show others how a simple sticker totally changed kitchen and bathroom. |
HOW TO APPLY BIG POSTERS, STRIPES AND BORDERS
Same instructions are valid for application of DRY ERASE STICKERS and for any other LARGE WALL STICKERS WITHOUT TRANSFER TAPE.
Lay out the sticker on a flat surface. Make sure it is not wrinkled and run your hand over it to make sure there are no creases and no visible bubbles.
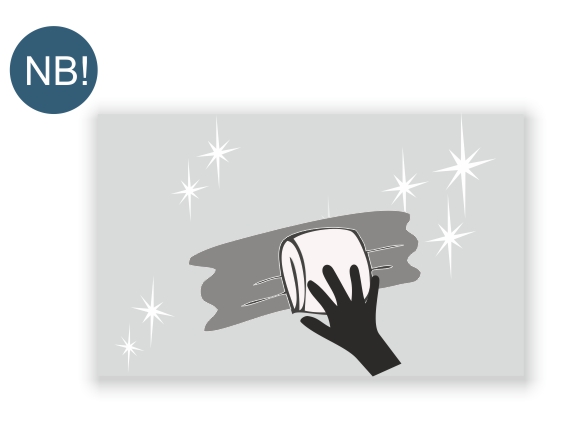 | 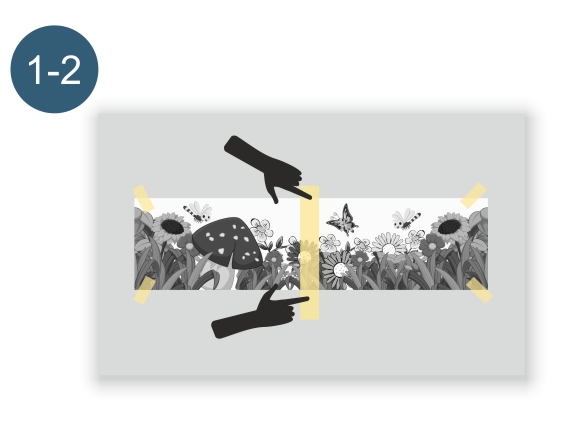 |
Reminder! Clean the surface with a wet cloth to ensure that there are no dust or small particles. | 1. Select the right place for the sticker on the wall. 2. Fix tightly with a stripe of tape across the middle. (horizontally or vertically, depending on sticker shape) |
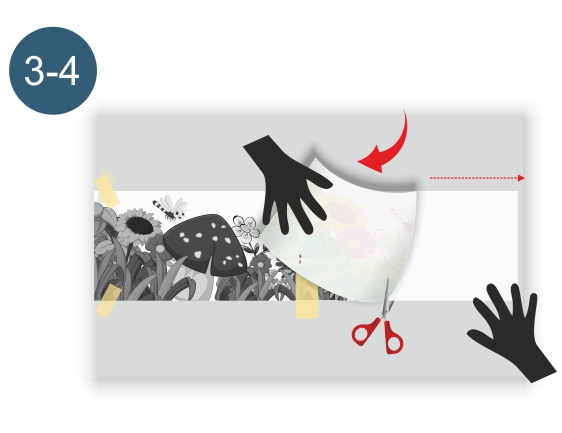 | 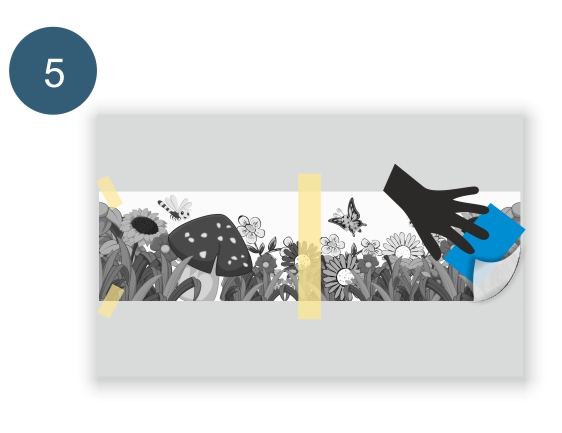 |
• Remove fixation tapes fro two of the corners. 3. Start carefully peeling off the sticker from tha paper back. 4. Cut off the paper as close to the stripe as possible. | 5. Start pressing the vinyl against the wall while constantly smoothing with the squeegee. • Make sure there are no bubbles. • Begin from the middle and press outward, slightly moving to the right. |
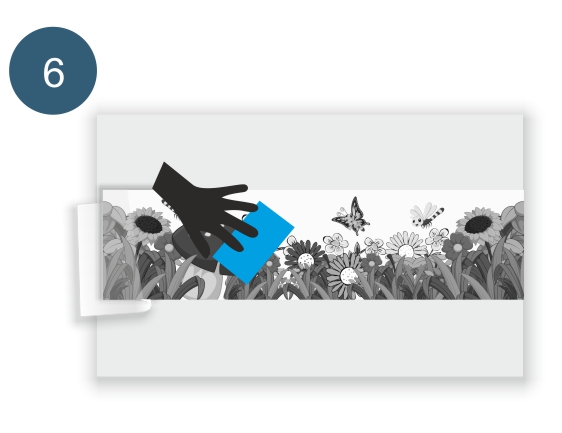 | 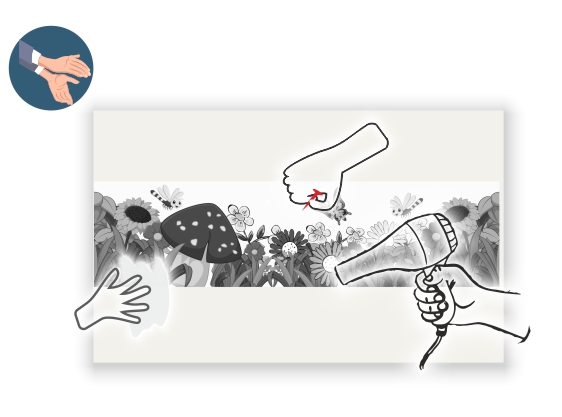 |
• Wait a few minutes and for the glue to tighten. 6. Repeat step 6 for the other half. | And here you have it! • you can wipe fingerprints stains.• if there are bubbles, punch them with a pin and then press.• if the wall is rough and the sticker does not stick tightly, warm with a hair drier, press. |
If you are wanting to remove your wall sticker for any reason, take a look at our guide on How To Remove Wall Stickers.
If you happen to come across any problems when applying your wall sticker or simply need some advice before starting, give us a call and we will be able to walk you through the steps and give you the correct information to help you put your decal on the wall.
